
As March unfolds, it’s critical to have Google’s Consent Mode V2 up and running. This update is more than a compliance requirement; it’s a step towards better privacy practices and smarter data use in our digital ecosystem.
From a recent CLICKTRUST Academy webinar, we’ve extracted three key points to ensure your Consent Mode V2 implementation is on track.
This guide is designed to cut through the complexity, offering clear, actionable steps. For a deeper dive into Consent Mode V2, the webinar provides thorough insights.
Let’s get straight to the point and make sure your setup is ready and robust.
A few quick reminders about consent mode
1) Consent mode enables you to communicate your users’ consent status for cookies or app identifiers to Google. It modifies how tags operate, ensuring they align with users’ preferences.
2) Consent mode receives your users’ consent choices from your cookie banner and dynamically adapts the behaviour of analytics, ads, and third-party tags that create or read cookies.
3) Activating consent mode means that Google’s measurement tools will consistently recognize and respect a user’s consent settings as they navigate through the different pages of your website or app.
What’s new with the consent mode v2?
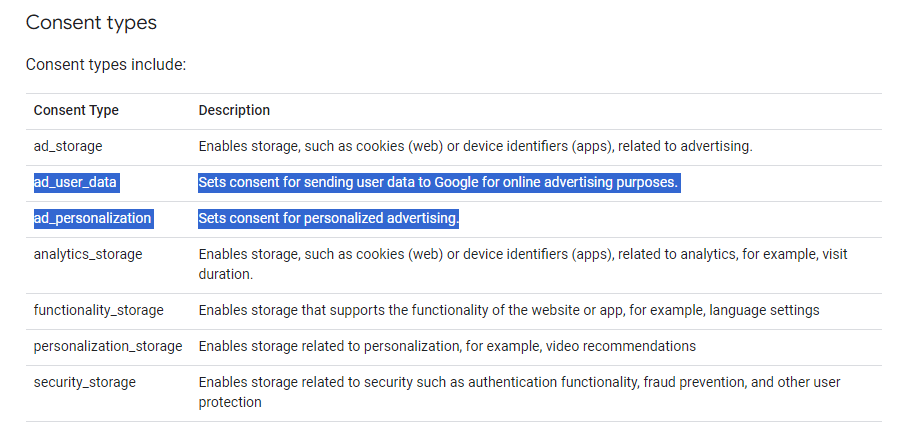
With consent mode v2, the major update is the introduction of two new consent signals, named ad_user_data and ad_personalization:
- ad_user_data: does the user consent to their personal data being used for online advertising?
- ad_personalization: does the user consent to their data being used for personalised advertising (remarketing)?
The other main update is that you have the flexibility to integrate consent mode into your website or application using one of two approaches: the basic or the advanced method.
The basic method
When you implement consent mode in its basic version, you prevent Google tags from loading until a user interacts with a consent banner.
The advanced method
When you implement consent mode in its advanced version, Google tags load when a user opens the website or app despite the consent having not been granted or not. By default, the consent is denied and the Google tags therefore send cookieless pings.
Following the user interaction with the banner, the consent states will be updated. If the user grants consent to data collection, Google tags send therefore the full measurement data.
This implementation enables improved modelling compared to the basic method as it provides an advertiser-specific model as opposed to a general model.
Consent Management Platform (CMP) Integration
Objective
Ensure your CMP is properly configured to interact with Google Consent Mode
Checklist
Confirm that your CMP triggers the dataLayer.push events for ad_storage and analytics_storage based on user consent. How to check it?
You can directly check it inside your GTM by following these easy steps :
1. First, make sure that your consent isn’t granted on your website. To ensure it you can go on your website, click right on the page > inspect > applications > cookies, select your website, click right and clear.
2. Open Google Tag Manager
3. Click on Preview
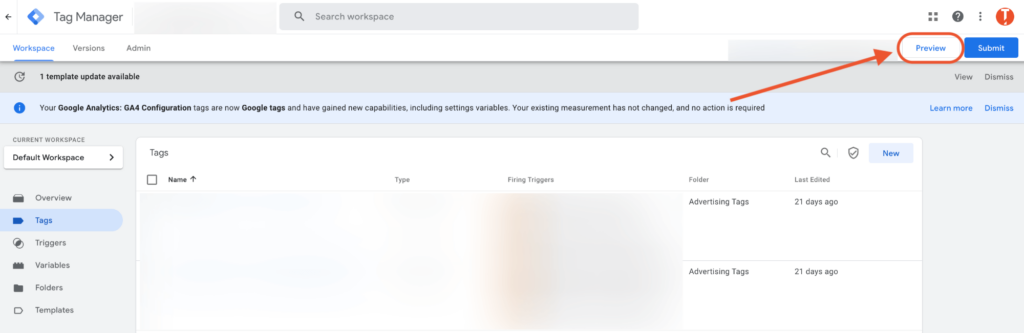
4. This will open a tab where you can input your website. Then you’re entering in preview mode.
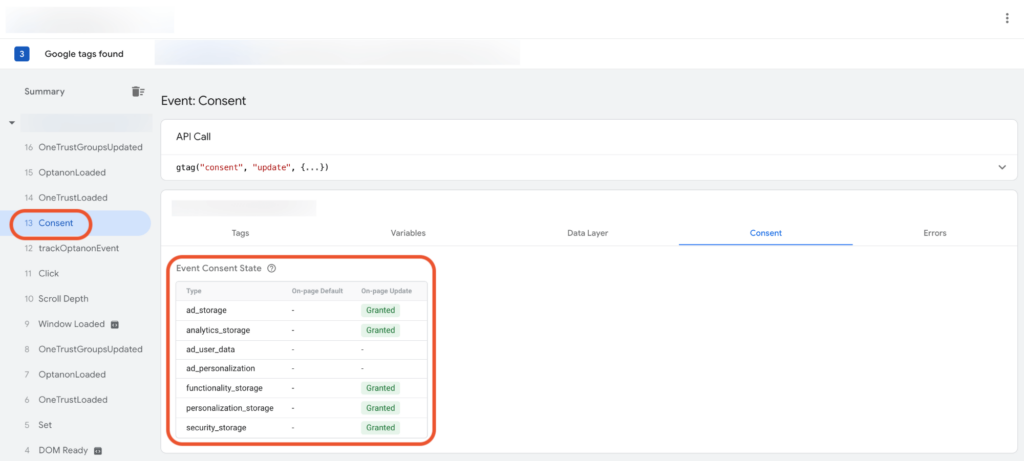
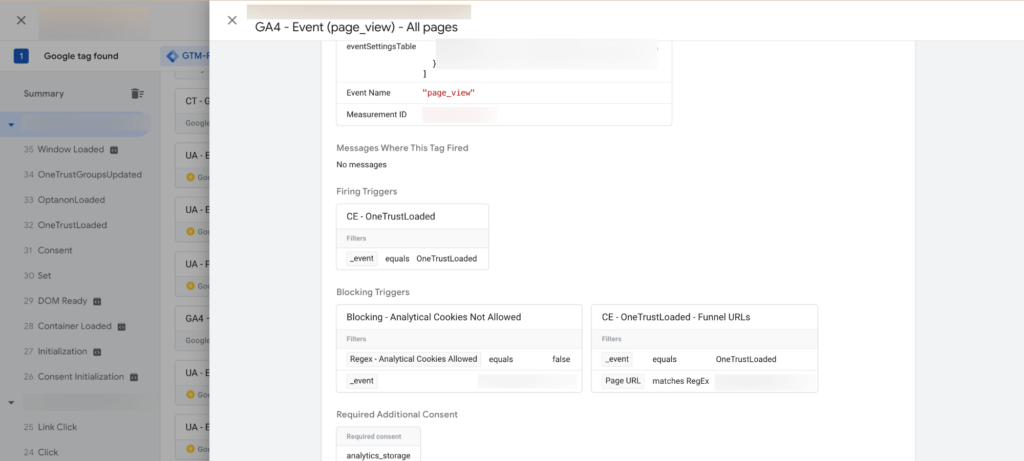
5. When the cookies banner is showing, accept the cookies. Then get back inside the preview mode and look for the event consent. You’ll see there that the consent has been granted on the cookies that you have accepted. In my case, I accepted it all.
Google Tag Manager (GTM) Configuration
Objective
Make sure GTM tags respect consent settings for data collection and advertising.
Checklist
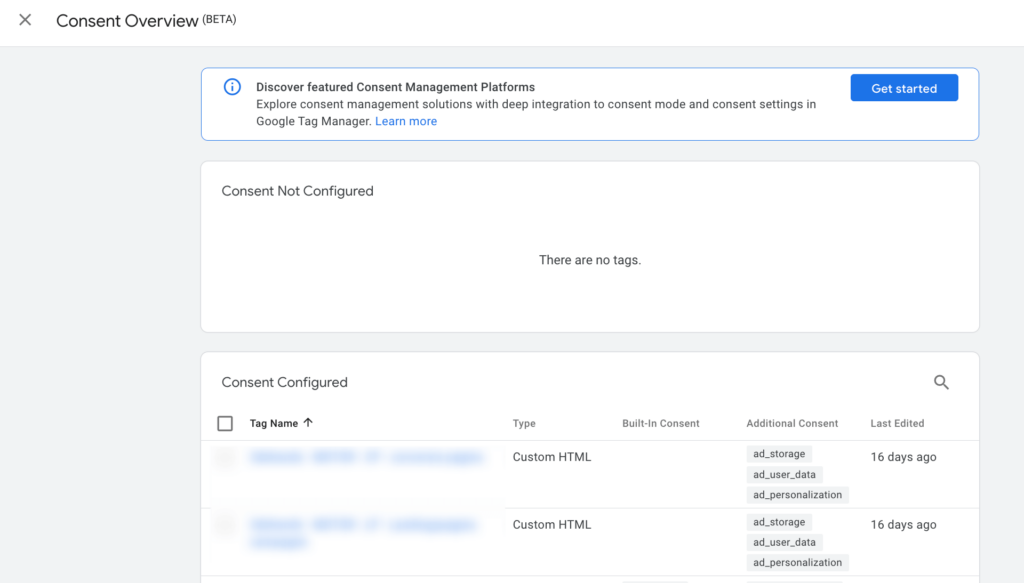
First, go to your consent setting interface in GTM. To access it you should have a small shield on your tags overview :
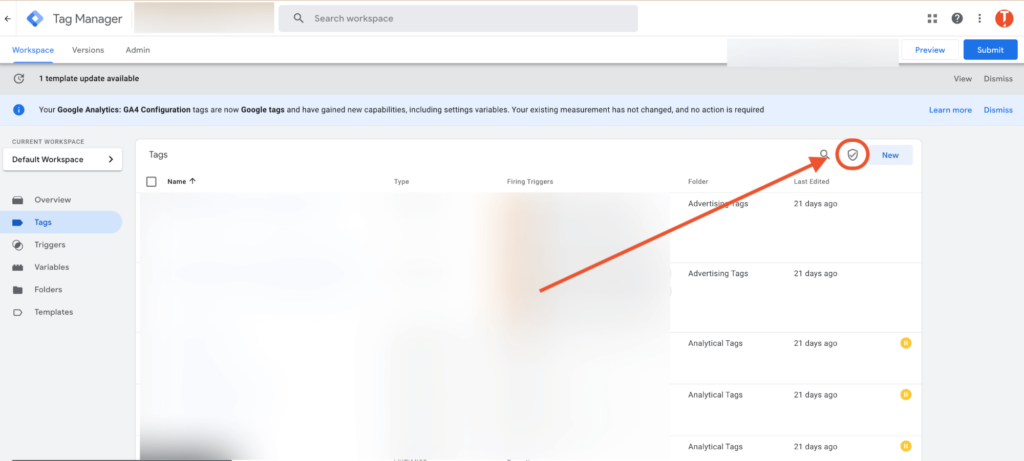
If you don’t see this shield, then you need to enable it in your admin section. Go to Admin > Container settings and check the box next to “Enable consent overview”.
Then ensure that all your tags are mapped based on the consent they require. For example, all your GA4 tags need to have the analytics_storage consent granted while your meta tags need to have the ads_storage granted. For all the ad tags, also make sure that you have added the ad_user_data and the ad_personalization consents. That way, your tags will fire only when the proper consent has been given.
Not sure how to do it? Go into the tag you want to update, scroll down to consent settings and add the proper consent to “Require additional consent for tag to fire”
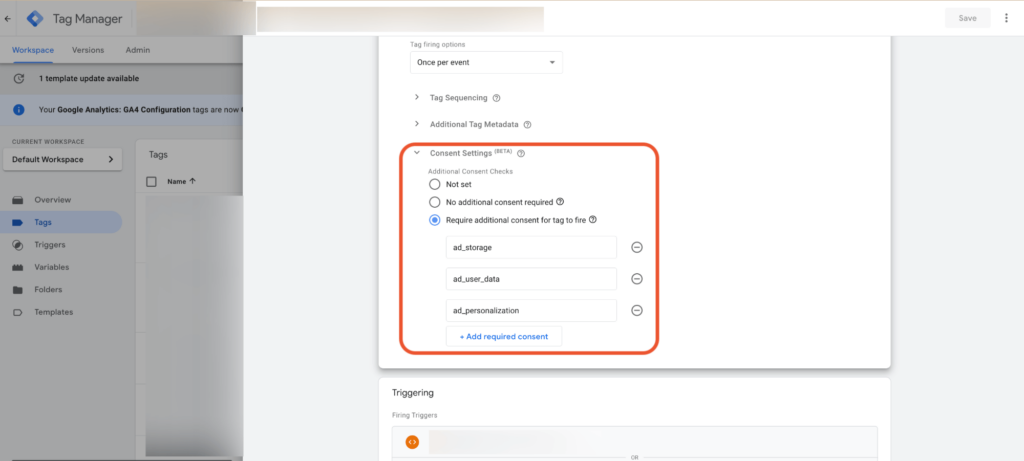
Then you can go back to the preview mode of GTM, and grant some of the cookies (for example only the analytics one). Then double-check that your analytic tags don’t fire. You’ll see it when clicking on the tags you’re checking.
Network Requests Inspection
Objective
Verify that network requests to Google services include consent parameters.
Checklist
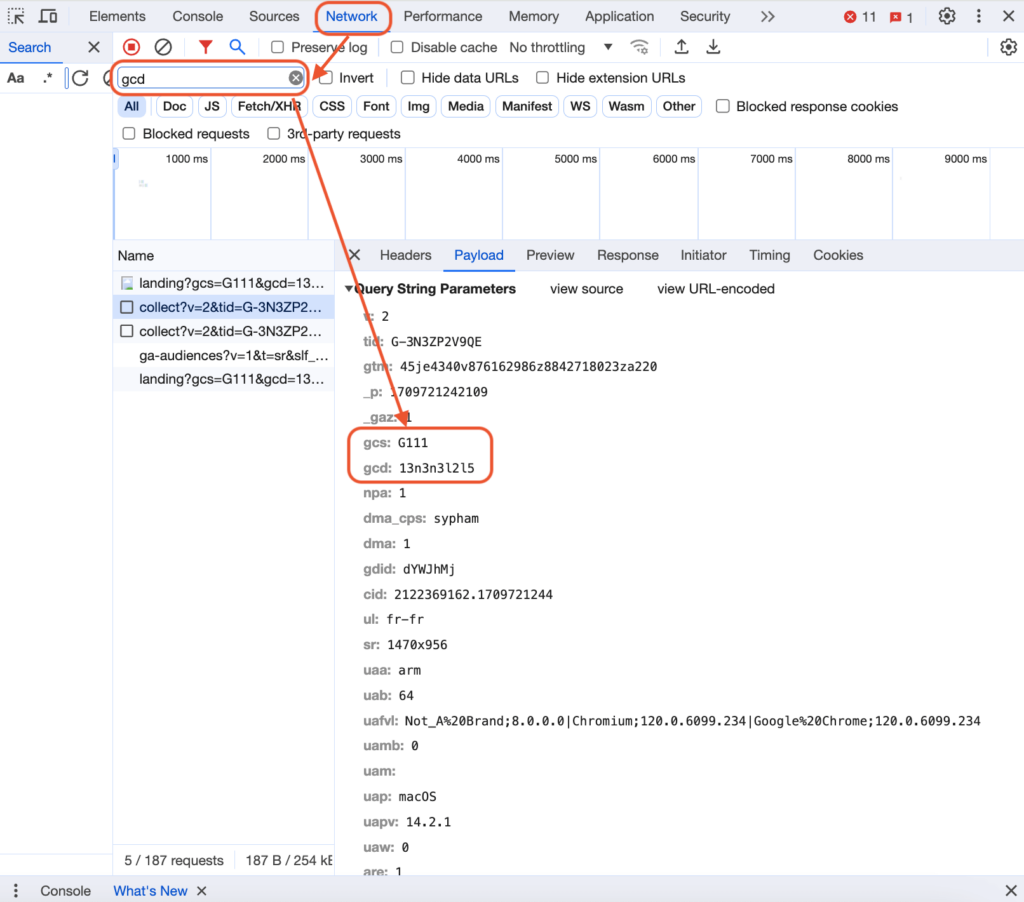
Look for consent parameters: gcs parameter is the one that refers to the original consent mode. It’ll return a parameter that shows what type of consent has been given. When consent mode V2 is correctly implemented, you’ll find next to it the gcd parameter.
Using your browser’s developer tools, inspect outgoing network requests to Google services to ensure that both gcs and gcd are showing. When on your website, click right on the page and go to inspect. Then go to network and look for the gcd parameter by searching for it on top of the page. If you then select payload you’ll see your gcs and gcd parameter.
Conclusion
Ensuring your Consent Mode V2 is properly implemented is crucial. With these three checks, you’re well on your way to achieving a compliant and efficient setup.
However, if you find yourself needing further clarification or assistance, don’t hesitate to reach out. Let’s tackle this together and ensure your digital practices are not only compliant but also pave the way for a privacy-respecting future.
Recevez notre newsletter &
nos insights
Nous approfondissons les sujets brûlants du marketing numérique et aimons partager.