Adform is a platform used for programmatic that offers different products such as DSP (Demand Side Platform) or DMP (Data Management Platform). This platform allows you to buy ad inventory and reach the desired audiences.
The core features of this platform are:
- Bid with intelligence
- Exclusive inventory
- Cross-Device
- Search retargeting
- Real-time algorithmic optimization
- Viewability based capping
But the real question is how to give access to a new user in Adform? That’s what you’re about to discover.
How to add a user to Adform?
Once you’re logged into the platform, you will have an “icon” in the header just next to the settings “icon”. By clicking on it, a new window about account settings will appear. In this window, you will have the “User management” option.
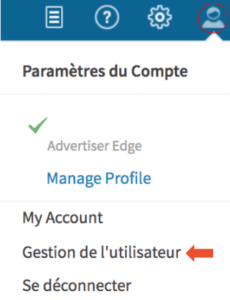
By selecting this option, you will arrive at the “Users” window where you will be able to click on “Create”.

Click on it and you will be redirected to Step 1 to be able to configure new user access.
Step 1
In this step, you just have to fill in details about the new user, such as email, profile name, and company,…
You also have the option to decide if this user will have “Admin rights” or not.
The fact that a user has “Admin rights” will have an impact. For example, if he doesn’t have it, he won’t be able to manage user access. If you select this option, the user will have access to all clients by default, but if you don’t give it you will have to select specific clients for this user.
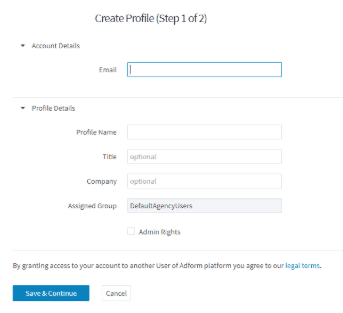
Once everything is filled in, click on the “Save & continue” button and you will be redirected to Step 2.
Step 2
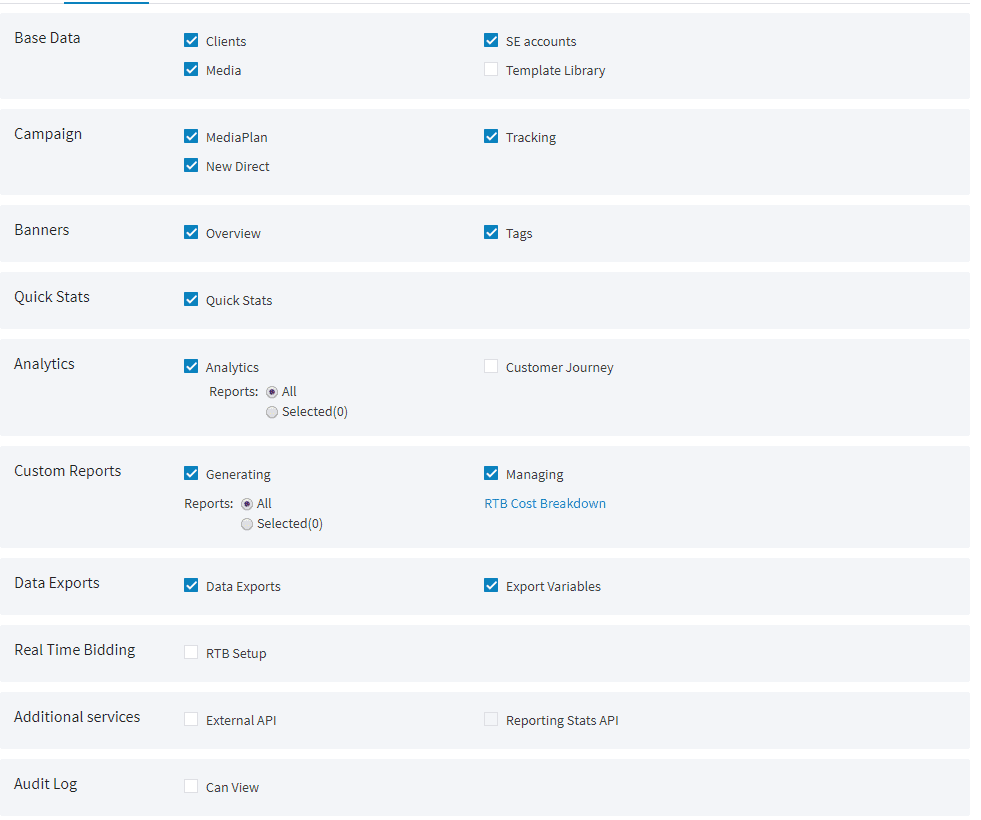
In this second phase, you will have different categories to fill in:
Details: this one is just a summary of Step 1 so all basic information about your user.
Module Access: you can select all the different settings and access that the new user can have.
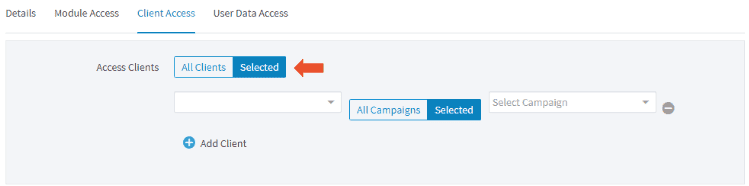
Client Access: this is where you will be able to decide to which client the user can have access. As previously mentioned, users with “Admin rights” have access to all clients by default but if they don’t have this right, you can select the clients but also the campaigns.
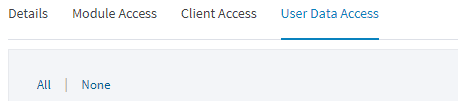
User Data Access: you can decide if the new user can have access to other users’ data access. With “Admin rights” he will have access to all but if not you will be able to decide.
Once everything is filled in, just click on the “Send and save invitation” button. You will be redirected to the overview of all users and just next to the new user you will see “PENDING”.
Create a new account in Adform
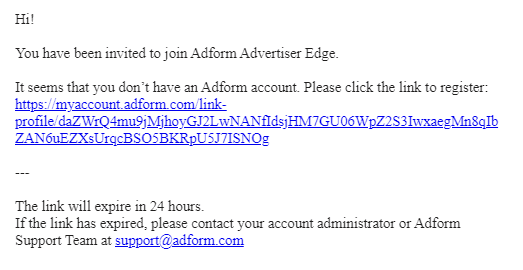
After that process, the new user will receive an email with a link to register. The link is only available for 24 hours, so don’t forget to prevent the user that you created access.
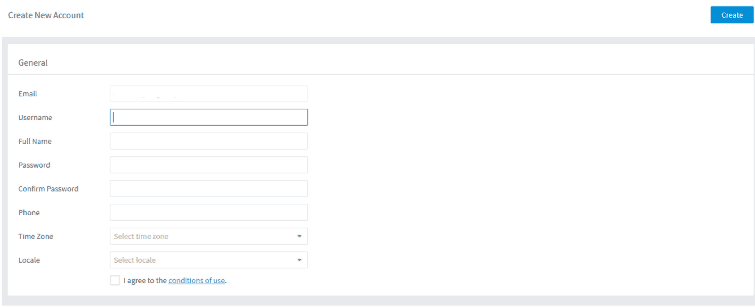
Once they click on the link, they will have to configure this new account by filling in general information such as username, full name, and password,… Then he will just have to click on the “Create” button to finalize this new account and access it.
After that, the user will finally have access and will be able to discover Adform.

How to modify or delete access in Adform?
Finally, in the future, you will maybe need to modify or remove access. In the “User management” view, you have an overview of all the users. To modify something in the access of the user, you just need to click on the name. Then you will have access to all the settings of their profile and you will be able to edit what you want.
It’s also possible that you will need to remove the access of one of the users. Put your mouse on the line of the user in the “User management” view and you will see the “deactivate” button appear. By clicking on it, a second window will pop up and you will have to decide to which user you want to reassign the campaigns of this user.
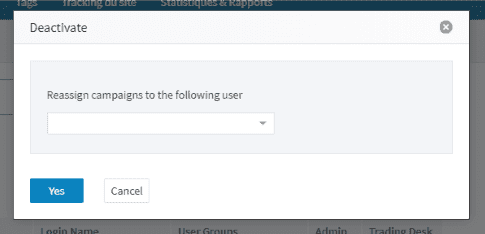
Then, by clicking on yes, the user access will be deactivated. But if for any reason, you need to reactivate it, it’s possible.
All the deactivated accounts are available in “Inactive Users” in the “User management” view.
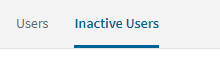
Once you are in the “Inactive Users” section, put your mouse on the name of the user and an “Activate” button will appear. Just click on it and then confirm by selecting “Yes”. You will see that the user is back in the “Users” section.
Recevez notre newsletter &
nos insights
Nous approfondissons les sujets brûlants du marketing numérique et aimons partager.