Google Tag Manager is a powerful tool where you can handle codes and scripts on your website. It will allow you to easily update your codes on your website or on your mobile app. In other words, through this tool, you will be able to collect data (thanks to specific tags and triggers) to understand how the users interact with your website.
It’s really important to give the right access to the right person and we know it’s not always easy to define what the relevant access is and how to grant it.
In this blog post, we will explain how to properly give access to a new user but also how to modify and delete it.
Before going deeper, the first thing you need to discover is the “Admin” part of Google Tag Manager. This is the place where you will be able to give access to your account or your container.
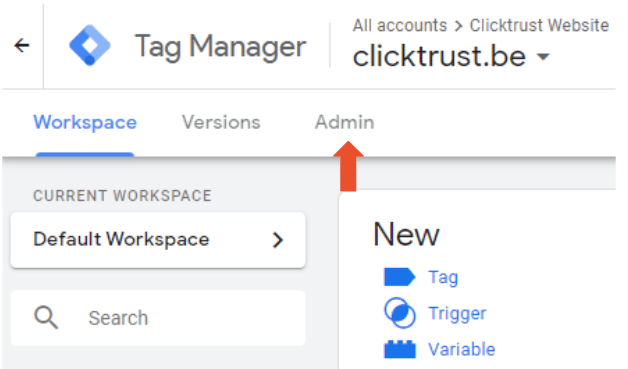
How to add a user to Google Tag Manager?
Once you are inside the admin settings, you can see the “User management” option for account and container levels. It’s through this option that you can give different access levels to users. How exactly? That’s what you’re about to find out.
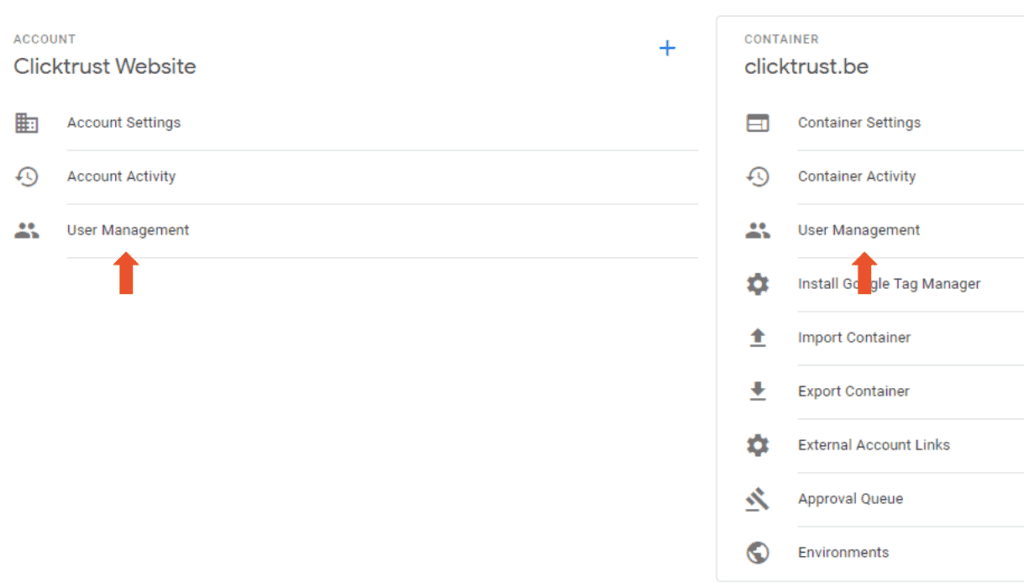
Add a user at the account level
By clicking on “User management” in the account column, a second window will open, you will see 2 options: “Add users” or “Add user groups”.

Click on “Add users” and fill in the email address of the user you need to add. Then, select the account permission: “Admin” or “User”.
Admin: this access allows you to edit user management, account settings, and account activity. Concretely, you can modify user permissions (on the account and containers level) and create new containers.
Users: in this case, you can only see the different settings but you can’t modify them.
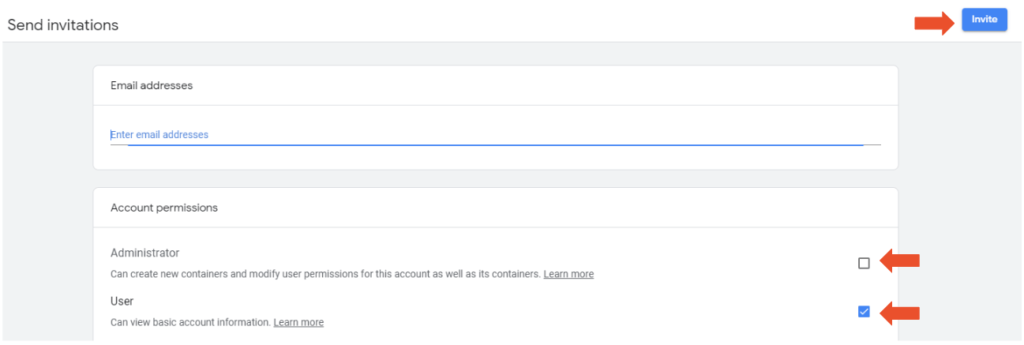
At the account level, you will be able to select the permission level for the different containers as well.
For the second option, “Add user groups”, you need to link your account to Google Marketing Platform.
Adding a user at the container level
It’s also possible to add a user to only one of your containers. If you are handling several websites for your company, you can limit the access of the user to only one of your websites.
To give access, it’s exactly like for the account level. Click on “user management” in the container column, then “Add users”, fill in the email address, and select the access level. This email address has to be linked to a Google account.
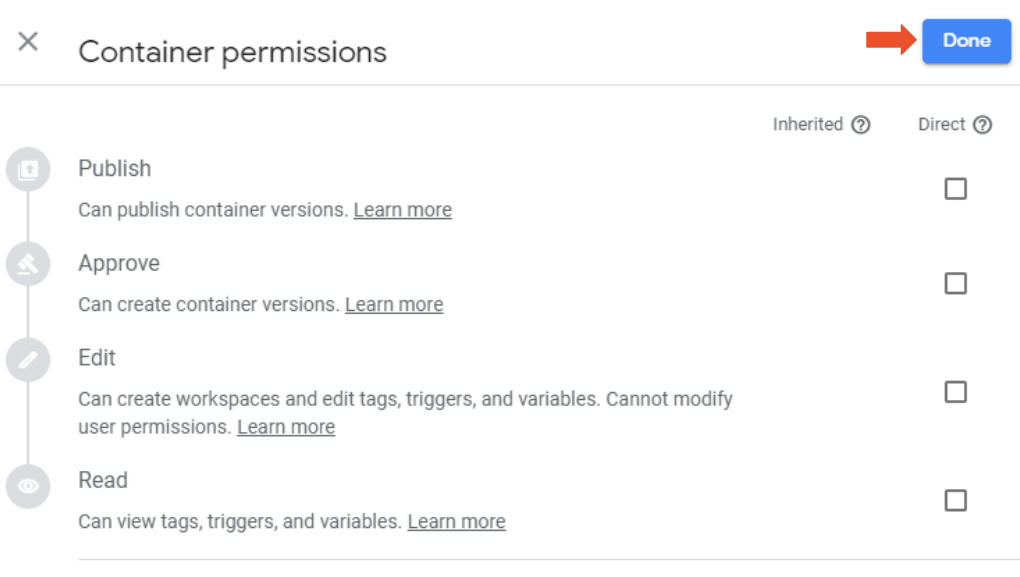
One last way to give access to a specific container, it’s through the “Zones” settings but this option is only available with Google Tag Manager 360.
“Zones” solves issues of scale and are useful if you have different restrictions for different pages, if you work with different teams or if you use different containers on different websites.
How does it work? It creates a second container on the same page where you will be able to create separate tags, triggers, and variables but from the same data layer.
To be able to do that, you have to click on “Zones” in the left-hand navigation.
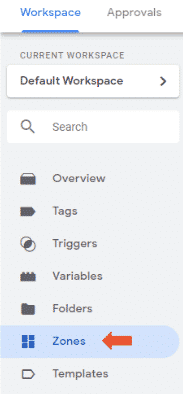
In this case, you can also give different user permissions.
The different access levels in GTM
Now that you know how to add a user, you have to decide which type of user access you will give:
Read: as said in the name, users can only view what is in the GTM account such as triggers, variables and tags but can’t modify them. Why is it useful ? If you don’t want other people to touch or modify things in your GTM when they do need to know what’s being tracked.

Edit: users will be able to add, modify or delete tags, triggers, and variables.
Approve: this is the same as “edit” access but you can also approve modifications done by other users.
Publish: users will be able to add, modify, and approve but also publish the content.
Admin: this is the same as “publish” access but you can also give access to users, so in other words, you are the Queen or the King of the GTM world.
How to modify or delete user access in Google Tag Manager?
Aside from adding a user, modifying their access level or deleting the user is also a possibility. Why would you do that? If someone leaves your company or if you decide to work with a new agency, for example, you don’t want them to keep the GTM access.
In the list of users, you can click on the email address of the user, then you will be able to select or unselect a permission level and even click on “remove”.
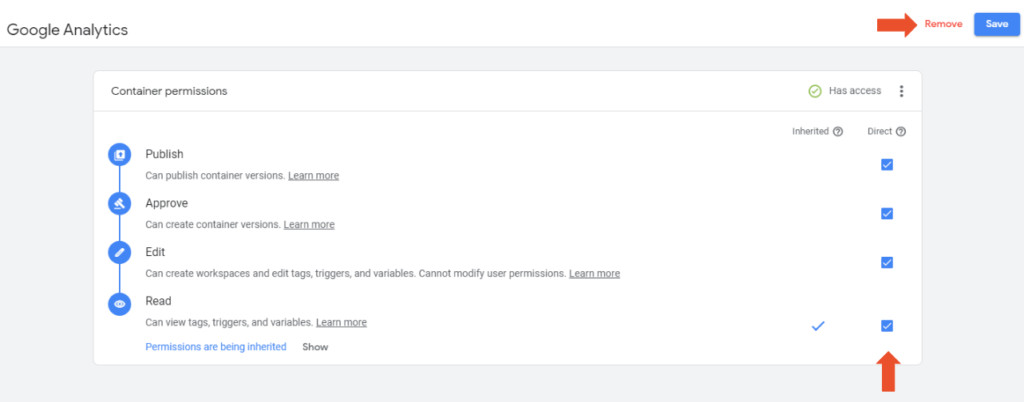
Finally, sometimes you will also have to give access to Google Analytics at the same time. Discover how to give access in Google Analytics.
Ontvang onze inzichten rechtstreeks in je inbox
We duiken regelmatig in actuele onderwerpen op het gebied van digitale marketing en delen onze inzichten graag met jou.

