
Serverside tracking represents a paradigm shift in how businesses approach data collection and analytics. Piwik Pro has adapted to this change, allowing users to harness server-side tracking capabilities.
This article delves into the intricacies of setting up Piwik Pro’s serverside tracking through the widely-used Google Tag Manager (GTM). By integrating serverside tracking via GTM, businesses can achieve more reliable data collection, enhanced user privacy, and compliance with stringent data protection laws.
We will explore the benefits of this approach, provide a step-by-step guide on implementation, and discuss best practices for getting the most out of your serverside tracking efforts. Whether you’re a privacy-conscious organization or simply looking to refine your analytics, understanding how to leverage Piwik Pro with GTM will be a significant asset.
In this article, we are using a Core version of the Piwik Pro license, which requires a GTM setup. Enterprise users can also opt for a solution for Serverside tracking without Google Tag Manager which is explained here.
The benefits of server-side tracking
Serverside tracking has several benefits compared to clientside tracking:
Improved Data Accuracy
Server-side tracking can provide more accurate data because it is less susceptible to ad blockers, browser limitations, and user settings that can interfere with client-side tracking. This leads to a more comprehensive and reliable data collection process.
Reduced Ad Blocker Impact
Ad blockers often block client-side tracking scripts, which can result in incomplete or skewed data. Server-side tracking can help mitigate this issue since the tracking requests are made from the server and are less likely to be blocked by ad blockers.
Enhanced Privacy Compliance
Server-side tracking can be designed to be more privacy-friendly. It allows website owners to process and collect data in a way that aligns with privacy regulations and user consent preferences. This can help in maintaining compliance with data protection laws like GDPR and CCPA.
Increased Security
With server-side tracking, sensitive data and tracking logic are stored on the server rather than the client-side, making it more challenging for malicious actors to manipulate or compromise the tracking data.
Better Performance
Server-side tracking can offload some of the processing burden from the user’s device, potentially leading to faster page load times and improved overall website or app performance.
Cross-Device Tracking
Server-side tracking can help in cross-device tracking and attribution by consolidating user data from different devices into a single user profile, offering a more holistic view of user behavior.
Custom Data Processing
Server-side tracking allows for more extensive data processing and customization. Data can be transformed, enriched, and integrated with other systems, enabling more advanced analytics and reporting capabilities.
Scalability
Server-side tracking can handle high volumes of traffic more effectively. It can scale horizontally by adding more server resources to accommodate increasing data loads.
Mitigating Data Loss
In client-side tracking, users might leave a webpage before all tracking scripts execute, leading to data loss. Server-side tracking can mitigate this issue by ensuring that tracking data is sent and processed reliably.
A/B Testing and Experimentation
Server-side tracking can facilitate A/B testing and experimentation by allowing you to control and manipulate user experiences and track their interactions from the server-side, making it easier to manage experiments.
The challenges of server-side tracking
While server-side tracking offers several benefits, it also comes with its own challenges, such as increased server infrastructure costs and complexity.
In some cases, a hybrid approach combining both methods may be the most effective solution. Especially when there are several media platforms activated.
Two different Google Tag Manager Containers
cGTM
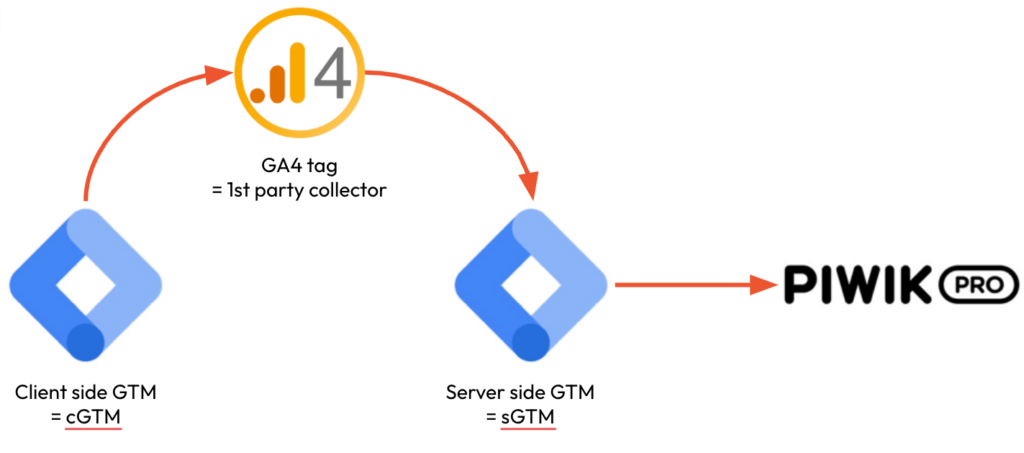
In a Server-side installation with Google Tag Manager, we need to use 2 different Google Tag Manager containers. One needs to be installed client-side. This is a GTM container that we usually use, and it needs to be installed in the source code of the website. For the sake of clarity, we will call this cGTM as of now.
sGTM
The second GTM container needs to be installed on the server. We will call this one the one sGTM. The installation of the sGTM is quite straightforward if we use a server on the Google Cloud Platform:
1) Click the “+” to create a new Google Tag Manager Container in your account
2) Name your container and select “Server”
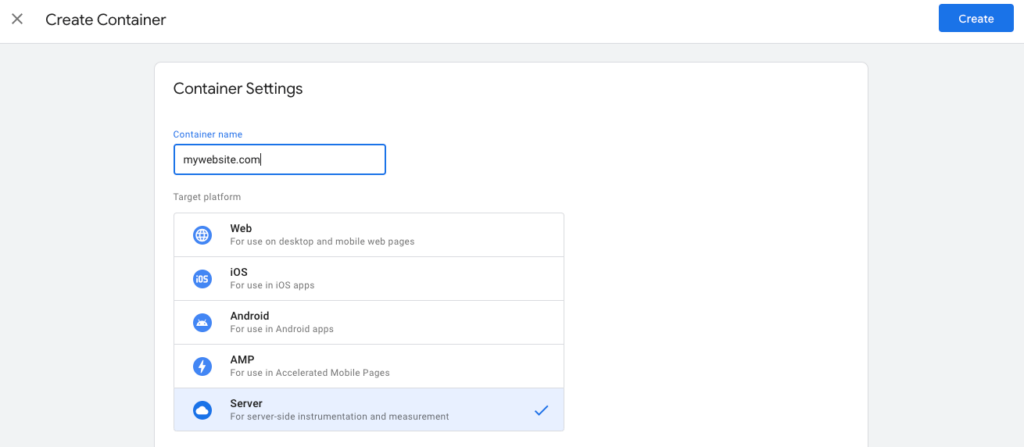
3) Click on “Create”
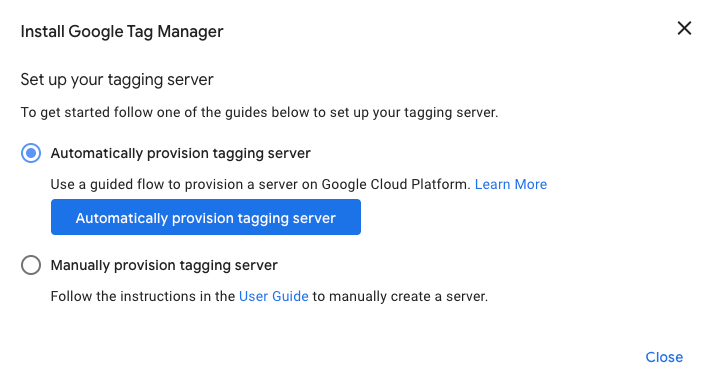
4) If you wish to use a server on Google Cloud Platform, click on “Automatically provision tagging server”
5) Select a billing account or create a new one
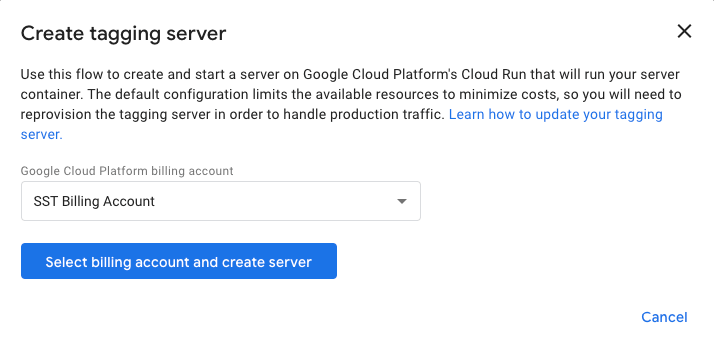
6) Click “Select billing account and create server”
7) Wait a few minutes for the server to be created
We now have both GTM containers up and running. It’s time to collect some data.
cGTM configuration
To create a bridge between the cGTM and the sGTM we’ll need to add a First Party Collector tag to the cGTM. This can be done by using the built-in GA4 tag. This tag will send all the data from the cGTM to the sGTM. So we are actually tagging the whole website with a GA4 tag as we would be doing with a Client Side installation, but we send the collected data to the sGTM with the First Part Collector.
The main GA4 tag needs to be configured as follows:
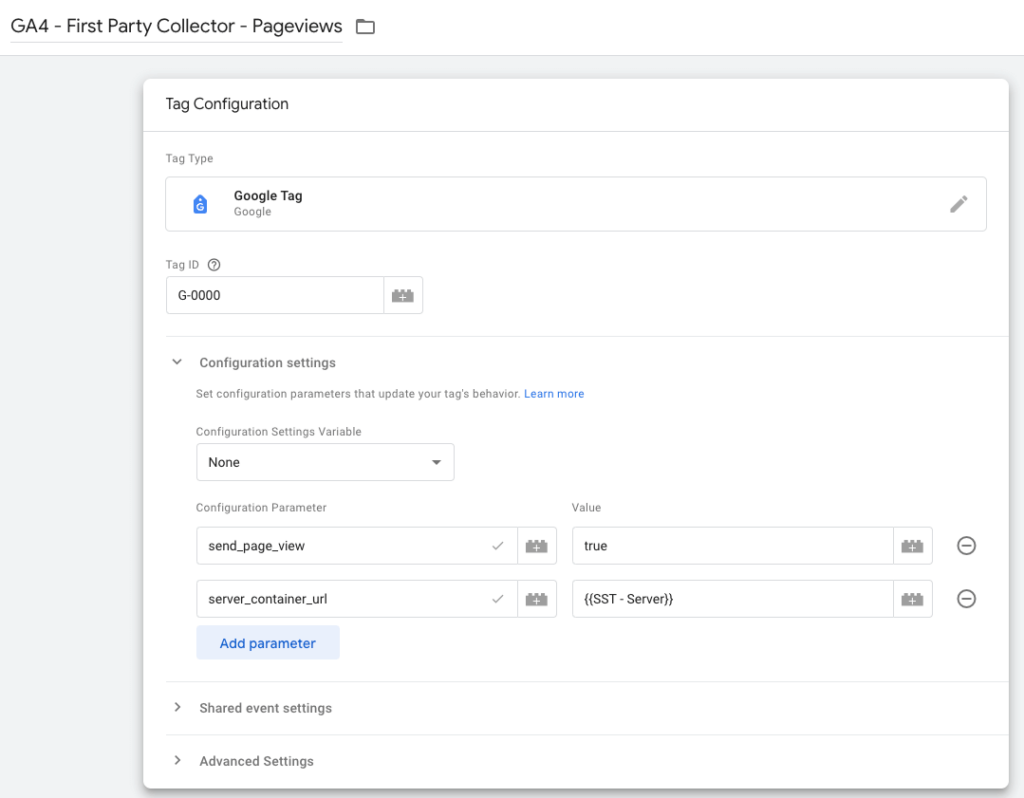
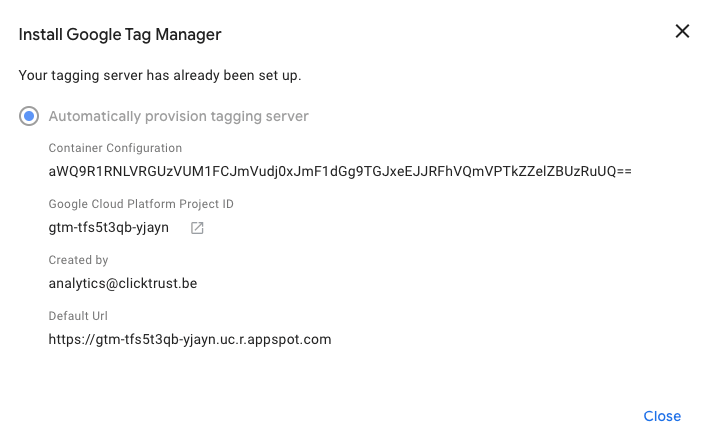
The value of the “server_container_url” you can find here:
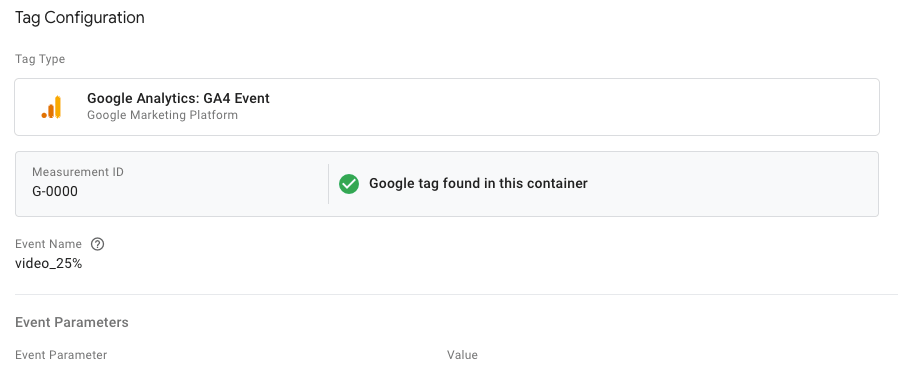
Additional events can be sent to the sGTM by using the normal GA4 event tags. No extra configuration is needed to send the data to the sGTM. Just make sure that you are using proper naming of the events so you can recognize them easily in the sGTM.
In the sGTM you should now see something like this:
Sending data from sGTM to Piwik
Having the data on the server side is the first step. We can now send the data we collected from the website to the different platforms we would like to use. In the first place, that is Piwik Pro.
Use a custom tagging template
For this, we need to add a tag template for Piwik. The template that is mentioned on the Piwik Pro website is a bit outdated, as it only takes the structure of Universal Analytics into account. We are using the GA4 tag as the first-party data collector.
As a solution, we have implemented this tag template from GitHub. This tagging template allows us to transfer the data from the GA4 structure to the Piwik structure and send the correct data to Piwik Pro.
To add the tagging template to the sGTM you can follow the following steps:
1) Go to the section “Templates” and click “ new in the Tag Templates
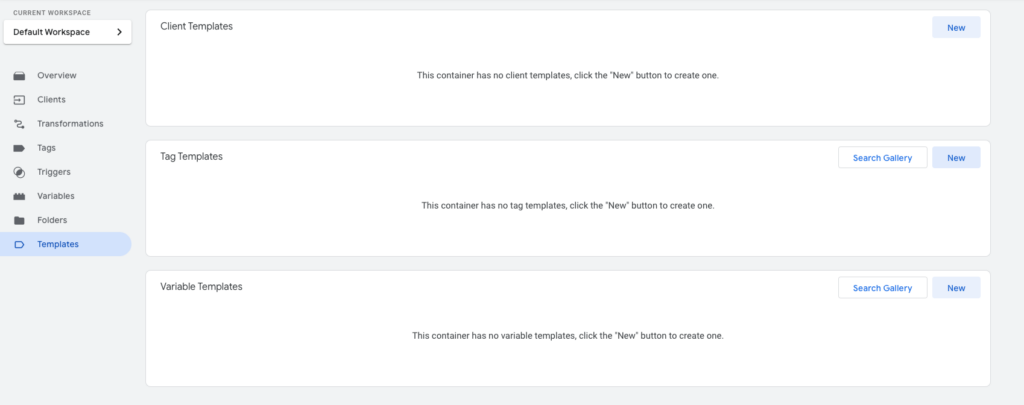
2) Click the 3 dots in the top right corner
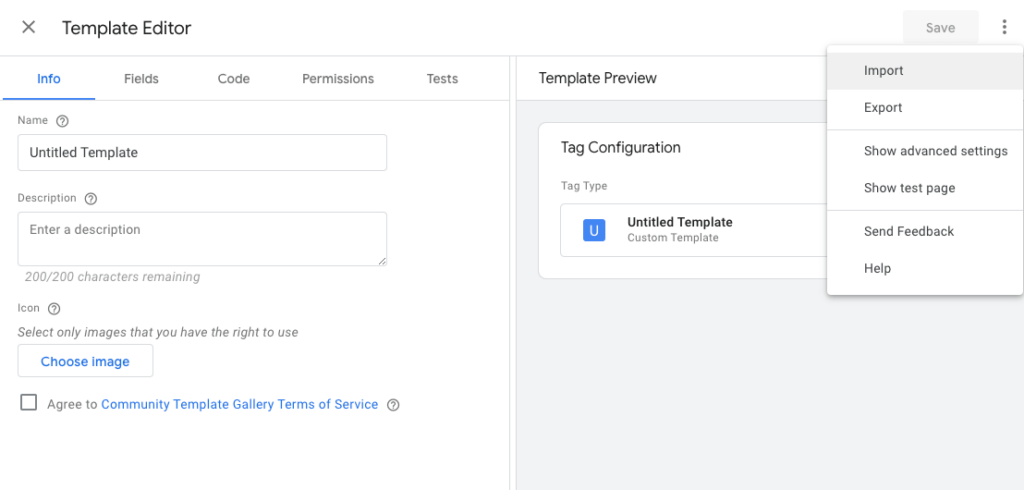
3) Select “Import” and select the template that you downloaded from the GitHub page
4) Click “Save”
Create your tags
When the tag template is created, you can create a tag in the sGTM as usual.
What we have learned is that the tagging template doesn’t work when you are using variables for the Account Address and Site or App ID. Just put them directly in the tag.
As for the trigger, we use all the events (note: since GA4 a page view is also part of the events) that the Google Analytics Client claims.
Piwik Consent Manager
The big benefit of using Piwik Pro is that you have an integrated Consent Manager included in both the paid and the free versions. Since we now have Piwik Pro running in the Serverside configuration we’ll need to make some adaptations to the configuration of the consent manager.
Configuring the Piwik Pro Consent manager in GTM is an easy 4-step process:
1) Put the Consent Manager on the client side
If we put Piwik Pro Serverside only the data on the analytics is transferred, but the consent manager is no longer working.
Fixing this can only be done by putting the Consent Manager on the client side. Since the Consent Manager is integrated into the Piwik Pro tracking code, we need to install the full code in the cGTM. By doing this, we need to make sure that we are not double-tracking from the Client side and Server side.
2) Deactivate the default Piwik Tag in the Piwik Pro Tag Manager
For this, we can simply deactivate the Piwik tag that is in the Piwik Pro Tag Manager container by default. We don’t need this tag to collect data and send it to Piwik Pro since we have the Piwik Pro tag in the sGTM that does that for us.
3) Consent Manager integration with Google Tag Manager
Now that the Consent Manager is working again, we need to use the Consent Manager to block the GA4 collector tags based on the consent given. For this, we refer to the Piwik Pro installation guide.
4) Adapt the First Party Data collector triggers
The only triggers you’ll need to adapt are the First Party Data collectors that send the data over to the sGTM. In each of the triggers you’ll have to include and extra rule that checks what consent is given, in this case “analytics_consent” is “on”.
Inside the sGTM, you don’t need to change anything. As long as the cGTM is not sending the data to the sGTM, the sGTM can’t forward it to the analytics platforms in this case Piwik Pro.
The downsides of this method
The only downside of this method is that the consent reporting won’t work anymore.
Conclusion
Although GTM is now GDPR-compliant, we don’t have a view on how long this will remain the case.
Currently, the installation of Piwik Pro Serverside is only possible through Google Tag Manager if you are on the Core version. IF you are on the paid version, our recommendation is to follow the Piwik Pro solution that they mention on the blog.
Installing Piwik Pro Serverside through GTM is a relatively easy process, but there is a need for Piwik Pro to also develop their Tag Manager further to be able to run on a server similar to the sGTM so that we can do an easy Serverside installation of Piwik Pro independent of Google products.
Ontvang onze inzichten rechtstreeks in je inbox
We duiken regelmatig in actuele onderwerpen op het gebied van digitale marketing en delen onze inzichten graag met jou.